

There’s nothing quite like the aroma of fresh, homemade bread filling your kitchen. Soft, fluffy, and with just the right amount of chew, homemade sandwich bread beats store-bought loaves every time. Plus, it’s surprisingly easy to make! No mysterious ingredients, no preservatives just simple, wholesome goodness.
So, why should you start baking your own sandwich bread? And what common mistakes should you avoid? Stick with me, and by the end of this guide, you’ll be baking like a pro!
“Good bread is the most fundamentally satisfying of all foods; and good bread with fresh butter, the greatest of feasts.” – James Beard
Table of Contents
Why Make Your Own Sandwich Bread recipe?
Sure, grabbing a loaf from the grocery store is convenient, but have you ever checked the ingredient list? Many store-bought breads are packed with preservatives, added sugars, and artificial flavors. When you bake your own, you control everything flavor, texture, and nutrition.
Benefits of Homemade Bread Over Store-Bought
- Healthier Ingredients: No chemicals, no additives just real food.
- Better Taste: Freshly baked bread has a rich, buttery flavor you can’t find in a bagged loaf.
- Customizable: Want a little sweetness? Add honey! Prefer a whole wheat version? No problem!
- Cost-Effective: Making bread at home is cheaper in the long run.
- Fun & Therapeutic: Kneading dough can be incredibly satisfying (and stress-relieving!).
Is It Difficult to Make Sandwich Bread recipe at Home?
Nope! Many people assume bread baking is complicated, but it’s easier than you think. With the right ingredients, tools, and a little patience, you’ll have bakery-quality bread with minimal effort. Let’s dive into what you’ll need.
Ingredients for the Perfect Sandwich Bread recipe
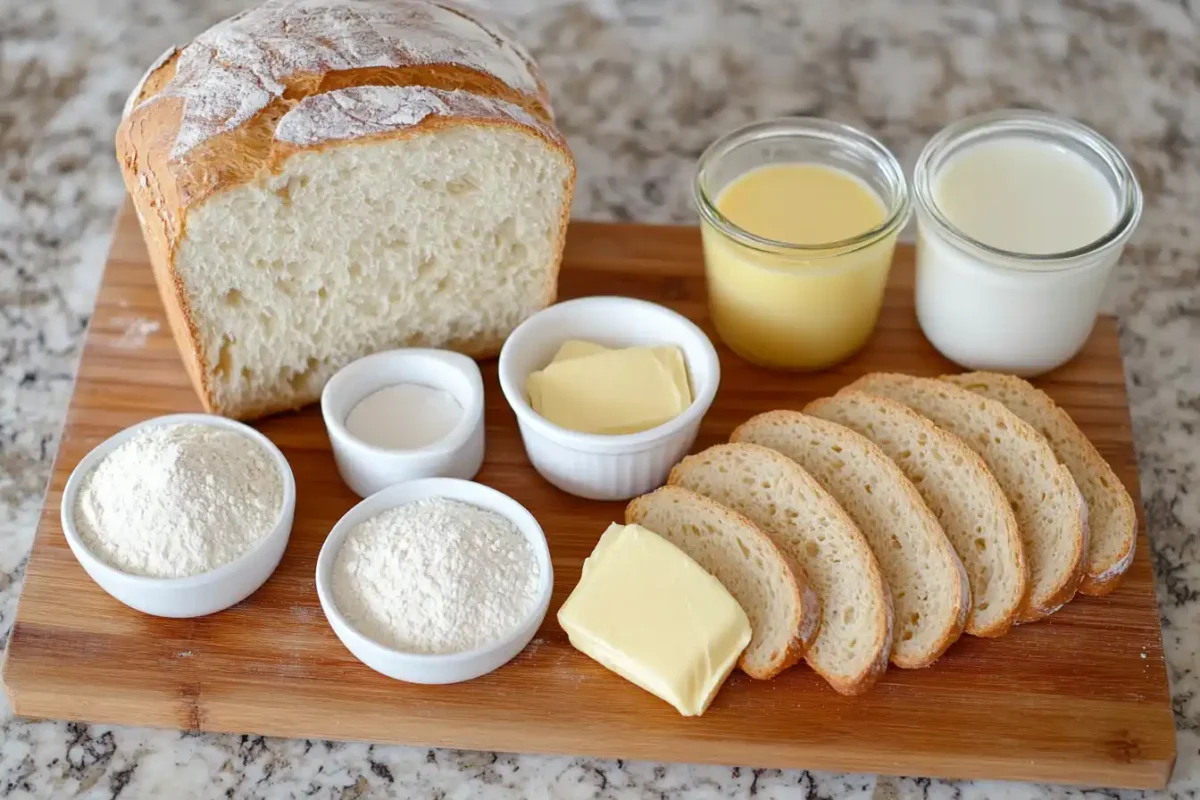
Great bread starts with great ingredients. Here’s everything you need for a classic, soft sandwich loaf:
| Ingredient | Quantity | Purpose |
|---|---|---|
| All-Purpose or Bread Flour | 3 ½ cups | Provides structure and texture |
| Warm Water (110°F/45°C) | 1 cup | Activates the yeast |
| Milk | ½ cup | Adds richness and softness |
| Active Dry Yeast | 2 ¼ tsp (1 packet) | Leavens the dough |
| Sugar or Honey | 2 tbsp | Feeds the yeast and enhances flavor |
| Unsalted Butter (melted) | 2 tbsp | Creates a tender crumb |
| Salt | 1 ½ tsp | Enhances flavor |
Flour Selection: All-Purpose vs. Bread Flour
Both all-purpose and bread flour work well for sandwich bread recipe. However, bread flour contains more protein, which helps create a slightly chewier, more structured loaf. If you prefer a softer texture, go with all-purpose flour.
The Role of Yeast: Instant vs. Active Dry Yeast
Yeast is the key ingredient that helps bread rise and become light and fluffy. You’ll commonly find two types:
- Active dry yeast must be dissolved in warm water before use.
- Instant Yeast: Can be mixed directly with flour.
Both work well, but if you’re using active dry yeast, make sure to proof it first (we’ll cover that in a bit!).
Sweeteners: Sugar, Honey, or Maple Syrup?
Adding a little sweetness to your dough enhances flavor and helps with browning. Sugar is the most common choice, but honey or maple syrup can add depth and a subtle twist to your bread.
The Secret to a Soft and Fluffy Texture
If you want that soft, airy texture found in the best sandwich bread, here’s what you need to do:
- Use the right amount of fat: Butter or milk creates a softer crumb.
- Knead properly: This develops gluten, which gives the bread structure.
- Don’t rush the rising time: Letting the dough rise slowly allows it to develop flavor and texture.
Essential Tools and Equipment for Bread Baking
Before you start, make sure you have the right tools. You don’t need anything fancy, but having these items will make the process much easier.
Choosing the Right Bread Pan
A standard 9×5-inch loaf pan is ideal for sandwich bread. If you use a different size, your baking time may vary.
Mixing and Kneading: Hand vs. Stand Mixer
Don’t have a stand mixer? No worries! You can knead by hand. Here’s how:
- By hand: Knead for about 8-10 minutes until the dough is smooth and elastic.
- With a stand mixer: Use the dough hook attachment and knead for 5-7 minutes.
The Importance of Proofing and How to Do It Right
Proofing (letting the dough rise) is crucial. Here’s how to do it properly:
- Place the dough in a lightly greased bowl.
- Cover it with a damp towel or plastic wrap.
- Let it rise in a warm place (around 75-80°F) until doubled in size.
Avoid proofing in a spot that’s too hot, as this can kill the yeast!
Step-by-Step Guide: How to Make Homemade Sandwich Bread recipe
1: Mixing the Dough
In a large bowl, mix warm water, sugar (or honey), and yeast. Allow it to sit for 5-10 minutes until it becomes foamy, indicating that the yeast is alive and active.
2: Kneading the Dough to Perfection
Add flour, melted butter, salt, and milk to the yeast mixture. Stir until a dough forms, then transfer to a floured surface.Knead for 8-10 minutes until the dough turns smooth and elastic.
3: First Rise – Letting the Dough Develop Flavors
Place the dough in a greased bowl, cover it, and let it rise for 1 to 1.5 hours, or until it doubles in size.
4: Shaping the Dough for the Perfect Loaf
Punch down the dough gently to release excess air, then shape it into a loaf. Place it into a greased loaf pan.
5: Second Rise – Achieving the Ideal Volume
Let the dough rise again for about 30-45 minutes until it puffs up slightly above the rim of the pan.
6: Baking – Temperature & Timing Tips
Now comes the moment of truth baking your bread to golden perfection! Follow these steps to get that perfectly soft and fluffy loaf:
- Preheat your oven: Set it to 375°F (190°C). A fully preheated oven ensures even baking.
- Optional egg wash: For a slightly golden crust, brush the top with a beaten egg or milk.
- Bake time: Place the loaf in the center of the oven and bake for 30-35 minutes until golden brown.
- Check for doneness: Tap the top of the loaf it should sound hollow. You can also use a thermometer; the internal temperature should be around 190-200°F (88-93°C).
Once baked, remove the bread from the pan and place it on a cooling rack. Let it cool for at least 1 hour before slicing this helps set the texture and keeps it from getting gummy inside.
7: Cooling and Storing for Maximum Freshness
Hold off on slicing your bread immediately to let it set properly! Cooling is just as important as baking. Let’s talk about how to store it properly so it stays fresh longer.
Best Ways to Store Homemade Bread
- Room Temperature: Keep in an airtight bag or bread box for up to 3-4 days.
- Refrigeration: Not recommended—this can dry out your bread.
- Freezing: Wrap in plastic wrap and store in a freezer bag for up to 3 months.
How to Refresh and Reheat Stale Bread
If your bread starts getting stale, don’t worry there’s an easy fix!
- Oven Method: Wrap the bread in foil and bake at 325°F (163°C) for 10 minutes.
- Microwave Method: Wrap in a damp paper towel and heat for 15-20 seconds.
Variations: Making Different Types of Sandwich Bread recipe
Once you master the basic recipe, why not get creative? Here are some exciting variations you can experiment with.
Whole Wheat Sandwich Bread recipe
For a healthier twist, swap half of the all-purpose flour for whole wheat flour.
Multigrain or Seeded Bread
Want a little crunch? Add sunflower seeds, flaxseeds, or oats into the dough for extra texture.
Gluten-Free Sandwich Bread recipe
Use a gluten-free flour blend and add 1 teaspoon of xanthan gum for elasticity.
Sweet Milk Bread for a Softer Texture
Increase the sugar to ¼ cup and add an extra ¼ cup of milk for a slightly sweet, super-soft bread.
Creative Ways to Use Your Homemade Sandwich Bread recipe
Now that you’ve baked a beautiful loaf, what can you do with it? Here are some fun ideas:
Classic Sandwich Ideas

- PB&J: A timeless favorite.
- Turkey & Cheese: Perfect for lunch.
- Avocado Toast: Add a sprinkle of chili flakes for a kick.
Toasted Creations: Grilled Cheese, French Toast & More
- Grilled Cheese: Crispy outside, gooey inside.
- French Toast: Soak in egg mixture and fry until golden.
- Garlic Bread: Brush with garlic butter and toast.
Croutons, Bread Pudding, and Other Leftover Uses
Got leftover bread? Don’t let it go to waste!
- Homemade Croutons: Cube the bread, toss with olive oil and seasoning, and bake until crispy.
- Bread Pudding: Soak in milk, sugar, and eggs, then bake for a delicious dessert.
- Breadcrumbs: Blend stale bread into fine crumbs for cooking.

If you’re looking for another delicious homemade treat, try these Rotel Cream Cheese Sausage Balls—they’re the perfect savory snack to pair with your freshly baked bread!
Frequently Asked Questions (FAQ) About Homemade Sandwich Bread
1. How can I make my sandwich bread softer?
For extra softness, use milk instead of water, add a little more butter, and be sure not to overbake your bread.
2. Can I freeze homemade sandwich bread?
Yes! Wrap the loaf in plastic wrap and store it in a freezer bag for up to 3 months. Thaw at room temperature before slicing.
3. What’s the best way to store sandwich bread?
Keep it in an airtight container or bread box at room temperature for up to 4 days. Avoid refrigerating, as it can dry out the bread.
4. Why didn’t my bread rise properly?
Your yeast may be expired, or your water may have been too hot or too cold. Also, ensure the dough is proofed in a warm spot.
Enjoy Your Perfect Homemade Sandwich Bread recipe
Congratulations! You’ve now mastered the art of making homemade sandwich bread. From selecting the right ingredients to troubleshooting common mistakes, you have all the knowledge you need to bake the perfect loaf every time.
So, what’s next? Try experimenting with different flavors, bake a few extra loaves to freeze, or turn your bread into a delicious sandwich creation. Whatever you do, enjoy every bite—because homemade bread is one of life’s simple joys!
“Happiness is the smell of freshly baked bread.”
Print7 Secrets to the Best Sandwich Bread Recipe Ever!
- Total Time: 2 hours 15 minutes
- Yield: 1 loaf (12 slices)
- Diet: Vegetarian
Description
This soft and fluffy homemade sandwich bread is easy to make and perfect for any filling. With simple ingredients and step-by-step instructions, you’ll bake a delicious loaf that’s better than store-bought.
Ingredients
3 ½ cups all-purpose or bread flour
1 cup warm water (110°F/45°C)
½ cup milk
2 ¼ tsp active dry yeast (1 packet)
2 tbsp sugar or honey
2 tbsp unsalted butter (melted)
1 ½ tsp salt
Instructions
Step 1: Activate the Yeast
- In a large bowl, mix warm water, sugar (or honey), and yeast.
- Let it sit for 5-10 minutes until it turns foamy.
Step 2: Mix the Dough
- Add flour, melted butter, salt, and milk to the yeast mixture.
- Stir until a dough forms.
Step 3: Knead the Dough
- Transfer dough to a floured surface and knead for 8-10 minutes until smooth and elastic.
Step 4: First Rise
- Place the dough in a greased bowl, cover, and let it rise for 1 to 1.5 hours or until doubled in size.
Step 5: Shape the Loaf
- Punch down the dough, shape it into a loaf, and place it in a greased loaf pan.
Step 6: Second Rise
- Let the dough rise again for 30-45 minutes until it puffs slightly above the pan.
Step 7: Bake
- Preheat the oven to 375°F (190°C).
- Bake for 30-35 minutes until golden brown and hollow-sounding when tapped.
Step 8: Cool & Enjoy
- Let the bread cool for at least 1 hour before slicing.
Notes
Use bread flour for a slightly chewier texture.
Add an egg wash for a shinier crust.
Store at room temperature for 3-4 days or freeze for up to 3 months.
- Prep Time: 15 minutes
- Cook Time: 30 minutes
- Category: Bread
- Method: Baking
- Cuisine: American
Nutrition
- Serving Size: 1 slice
- Calories: 120 kcal
- Sugar: 2g
- Sodium: 180mg
- Fat: 2g
- Saturated Fat: 1g
- Unsaturated Fat: 1g
- Trans Fat: 0g
- Carbohydrates: 22g
- Fiber: 1g
- Protein: 4g
- Cholesterol: 5mg